Midi Engine 3
MIDI Plugin For Unreal Engine 5 For Rhythm Games , Music Visualizers and DAW backend.
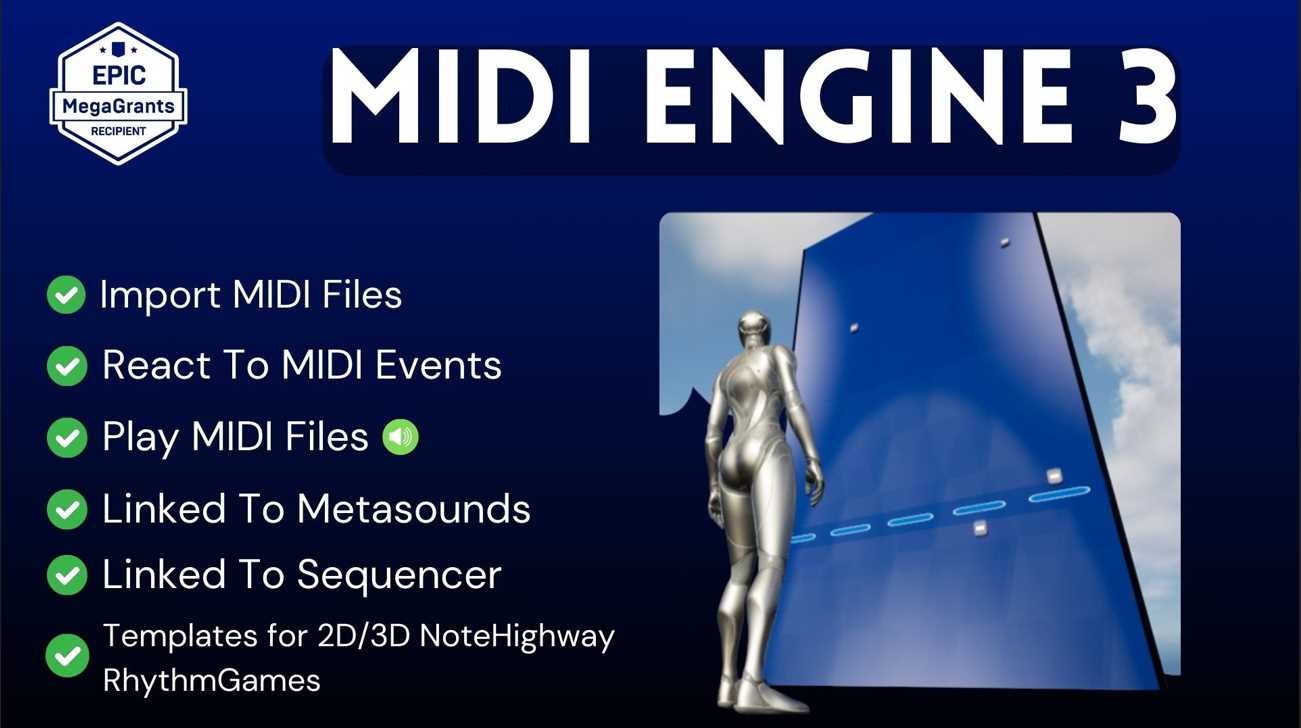
MidiEngine 3 adds various MIDI and MIDI File features for unreal engine to make to make the following tasks easier:
- Audio visuals
- Rhythm Games
- DAW-like capabilities
- Virtual Instruments(Samplers/Romplers)
- And more…
Key Features:
- MIDI File Import: Effortlessly import and manage MIDI files within Unreal Engine, enabling quick integration into your projects.
- MIDI Event Reaction: Build responsive audio-visual systems by having actors react dynamically to MIDI events.
- MIDI Playback: Smoothly play back MIDI files with precise timing and control. Make your own Samplers/Virtual Instruments for Audio Playback of MIDI Files.
- Integration with MetaSounds: The MIDI Player and Virtual Instrument system is linked directly to metasounds meaning you can further process the output audio if you wish.
- Integration with Sequencer: Synchronize MIDI playback with Unreal Engine’s Sequencer to align audio with animations and gameplay sequences. This is perfect for creating Music Synced Cinematics without leaving the Sequencer Editor.
- Templates for Rhythm Games: MidiEngine 3 comes with templates for creating 2D or 3D note highway rhythm games. These templates are highly customizable and almost every aspect can be changed.
Table of Contents
Getting Started
If you’ve just downloaded and installed MidiEngine 3 to any of the supported engine versions, then you might want to watch the “Post Installation” videos from this youtube playlist.
Optionally, You may also wish to install the MidiEngine Devices for Ableton Live.
Then you may want to see how MIDI Notes are structured by the plugin.
You can briefly visit it then come back here, you might need to take a look at it later on.
Okay, you can take a look at the templates, but in order to customize them to your liking, you need to be aware of a few concepts that will make your life easier.
Broadcasting And Listening Concept
Before we explore the example content, it’s crucial to understand how the MidiEngine Plugin operates with two fundamental concepts: “Broadcasting” and “Listening.”
The Plugin “Broadcasts” MidiNotes/Events to other UObjects during playback. The “Listening’ UObjects can then decide what to do with that information.
Broadcasting:
The Midi Player Component sends Midi events to actors or UObjects, allowing them to react without generating sound.
Used in rhythm games to trigger synchronized visual or gameplay effects without direct audio output.
Listening:
Actors or components detect and respond to Midi events, impacting sounds, visuals, or game states.For example, a visual effect might listen for a specific Midi note to trigger a burst of color or a character might perform a dance move in sync with a particular beat.
Integration in MetaSounds:
When integrating with MetaSounds, the Midi Player Component can also directly play MidiNotes, making the sounds audible to the player.
Importing Midi Files
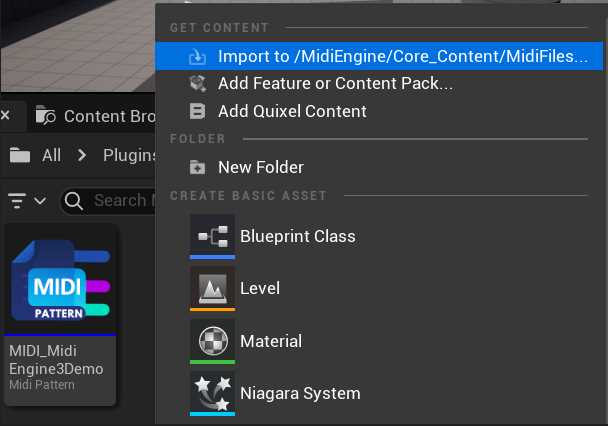
Once the plugin is activated, you can utilize Unreal Engine’s Import feature to bring MIDI files into your project. Simply left-click, choose the Import option, and select any .mid file from your disk. These MIDI files will be imported as “Midi Pattern” assets within Unreal Engine, which we will explore in more detail later.
The Content Folder
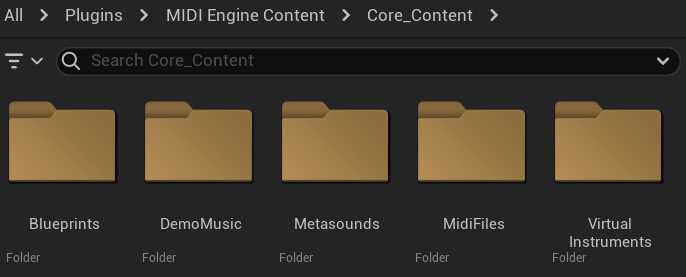
The MidiEngine 3 Content Folder offers blueprints and templates for quick setup. Enable “Show Engine Content” and “Show Plugin Content” in the Content Browser to access the MidiEngine plugin’s folder and explore the resources.

Core_Content Folder
The Core_Content Folder is your starting point, featuring basic examples that illustrate how MidiEngine utilizes MidiEvents to drive Unreal Engine Objects.
The Midi Player Actor Example
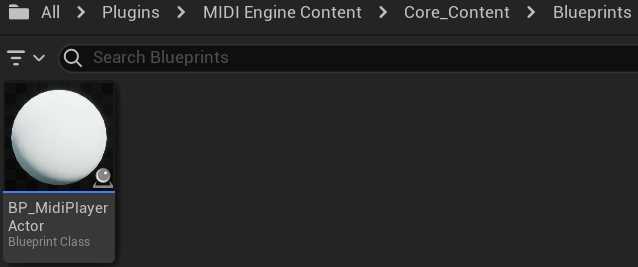
Inside the Core_Content/Blueprints Folder, you will find the BP_MidiPlayerActor. This blueprint showcases example code on how to create a MidiPlayer, manage it, and listen to its events. To test it, simply drag and drop the blueprint into any world in your project. When you press play or simulate, you will hear music—this is a MIDI file being played back in real-time. Let’s now delve deeper into the specifics of how the player operates.
The Midi Player Component
In the BP_MidiPlayerActor blueprint, one key component you’ll find is the MidiPlayerComponent (AxMidiPlayer). This component has several important functions:
- Broadcasting Midi Events: It can send Midi events to any UObject within the Unreal Engine system.
- Managing Virtual Instruments: It handles the setup and control of virtual instruments.
- Playing MidiNotes/Events: It plays MidiNotes and other events in metasounds using these virtual instruments.
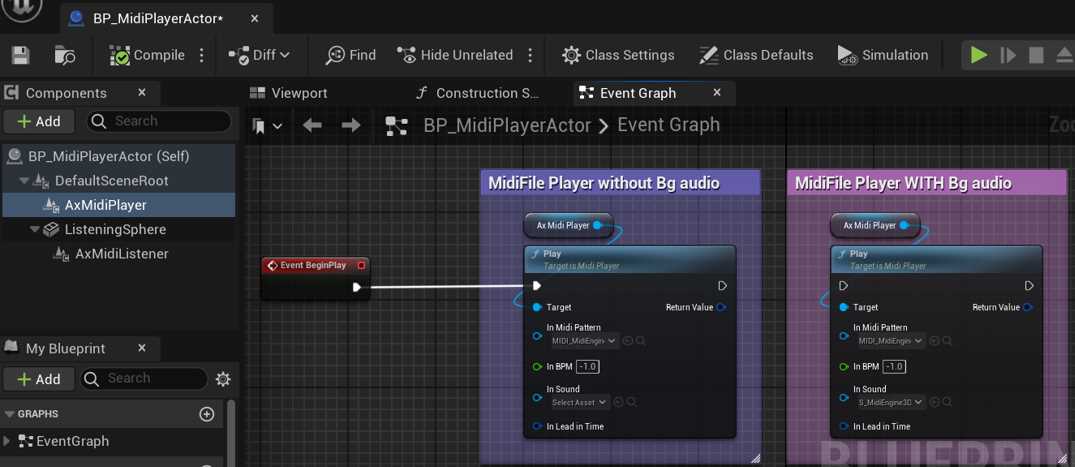
During playback, the Midi Player Component is highly versatile, capable of handling and broadcasting Midi Notes in several ways:
Silent Broadcasting: It can silently broadcast Midi Notes to other actors or UObjects, allowing them to react without actually producing sound. This is a common technique in rhythm games where interactive elements respond to Midi input but the audio output comes from another source.
Playing Notes through MetaSounds: Alternatively, the component can play Midi Notes audibly using MetaSounds, enabling you to hear each note as it is played.
Background Track Playback: Additionally, the component can play a background song or sound alongside the Midi file. This feature is often used in rhythm games to provide a continuous audio track that players hear while the in-game objects react to silent Midi triggers.
NB: From MidiEngine 3.6 onwards, the Background audio to play is set on the Music Session Asset on the content browser. “In Sound” is removed from the Play function.
Typically, you have a couple of options when using the MidiEngine Plugin:
- Play Background Music: You can play background music while silently broadcasting MIDI notes. This allows for visual or gameplay effects to be synchronized with the music without the MIDI notes themselves being audibly played.
- Use Virtual Instruments: Alternatively, you can play the song using virtual instruments and simultaneously broadcast every MIDI note. This method provides a richer audio experience as each note is audibly rendered through the instruments.
Additionally, it’s entirely feasible to combine these approaches: playing both the background audio and every note on a virtual instrument simultaneously. The system is flexible, allowing you to tailor the audio output to your project’s needs
The "Play" Function
Inputs
- MIDI Pattern Input (
InMidiPattern): The MidiPattern asset you want to play. - BPM Adjustment (
InBPM): Allows specifying the beats per minute. You can leave this as -1 and the Player will try read the BPM from the MidiPattern. If you want to override the BPM you can submit a value >0. The fallback BPM when no BPM info is available is 120 BPM. - Background Audio (
InSound): Optionally, add background audio to accompany the MIDI playback. - Lead-In Time (
InLeadInTime): Sets a lead-in time in seconds or beats, useful for timing the start of playback with other scene elements.
Monitoring with FAxMidiBroadcasterState
The Play function returns a FAxMidiBroadcasterState structure to provide feedback on the playback state:
- Broadcasting Status (
bBroadcasting): Indicates if the MidiPlayer is currently broadcasting/playing or not. - Current BPM (
BPM): Displays the BPM used during the broadcast, essential for synchronization and debugging. - Error Messages (
Message): Offers error messages for troubleshooting broadcasting issues
Other functions
The MidiPlayer Component provides essential playback controls:
- SetPlaybackPosition: Adjusts playback location.
- Pause: Halts playback temporarily.
- Resume: Continues from paused position.
- Stop: Ends playback and resets position.
These controls offer straightforward management of MIDI playback.
The Multi Playhead System
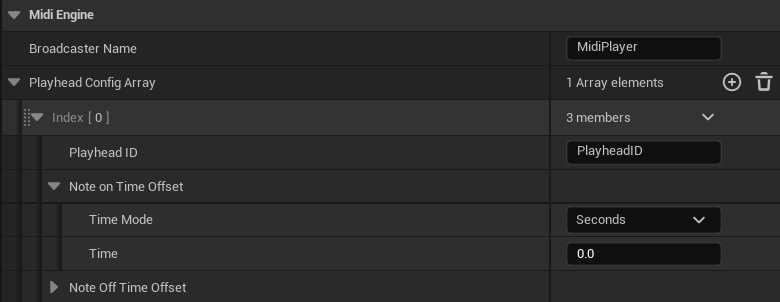
All MidiBroadcasters ( Including the MidiPlayerComponent) can have multiple playheads with different offsets executing during playback.
You can add more playheads in the details panel of the MidiPlayerComponent under “PlayheadConfigArray”.
Here’s how it works:
- Playhead With No Offset: This playhead operates directly in sync with the ongoing music, ensuring accurate playback without any delay.
- Playhead With An Offset: You can configure an additional playhead to be offset by a set amount of time, such as 3 seconds or beats ahead of the music. This allows the playhead to trigger the OnMidiNoteOn Event/Delegate 3 seconds ahead of time. You can then start doing/animating something that will complete in 3 seconds.
This preemptive insight is incredibly useful for aligning precise actions with audio events, like syncing animations to land exactly when a note plays. In rhythm games, this functionality ensures notes spawned earlier arrive perfectly timed at the judgment area, enhancing gameplay accuracy and player engagement. More on this below.
The Midi Listener Component
Now that we’ve covered how MIDI playback works, let’s shift our focus to how we can listen for and react to MidiNotes/Events using the Midi Listener Component (AxMidiListener). This component can be added to any actor that needs to respond to the MIDI signals broadcast by a midi player.
The MidiListenerComponent has two main Events/Delegates you want to bind to or subscribe to:
1. OnMidiNoteON – Triggered when a MidiNote turns On.
2. OnMidiNoteOFF– Triggerd when a MidiNote Turns Off.
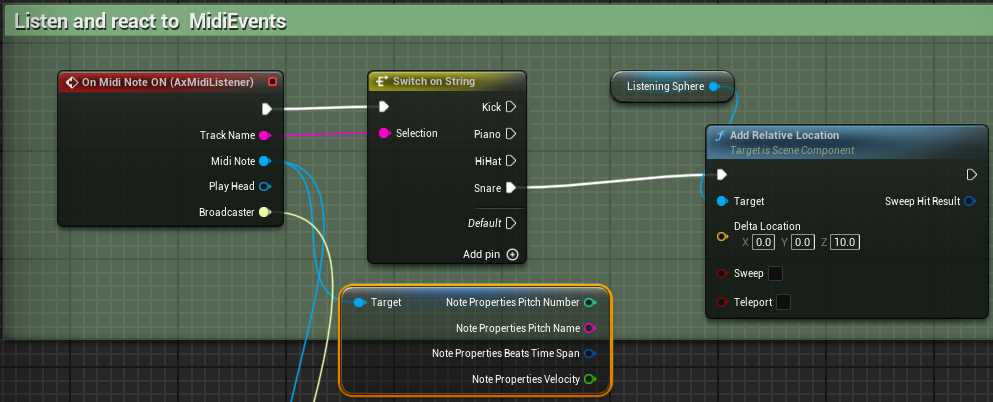
Here are some essential concepts to understand:
Multiple Broadcasters: Your scene or world can host any number of Midi Players/Broadcasters.
Universal Listening: By default, the Midi Listener component is set to receive signals from all Midi Players in the environment.a
Flexible Filter Adjustments: You have the flexibility to set up filters either statically in the details panel or dynamically at runtime. This allows you to adjust which MidiPlayer, MidiPlayhead, MidiTrack, or even specific attributes like pitch name and velocity to listen to, much like tuning into different radio stations.
These features make the Midi Listener Component a powerful tool for creating dynamic and responsive audio interactions in your Unreal Engine projects, allowing actors to adapt and respond to musical cues in real-time.

Exploring The Rest Of The Templates
If you’ve grasped the concepts discussed above, you’re now well-prepared to explore the remaining example content and assets independently. All the blueprints included are well-documented with comments that explain each step and functionality, ensuring you can follow along and understand what’s happening as you progress through the materials. This setup is designed to help you apply what you’ve learned and experiment with the features effectively.
Note Highway Rhythm Games
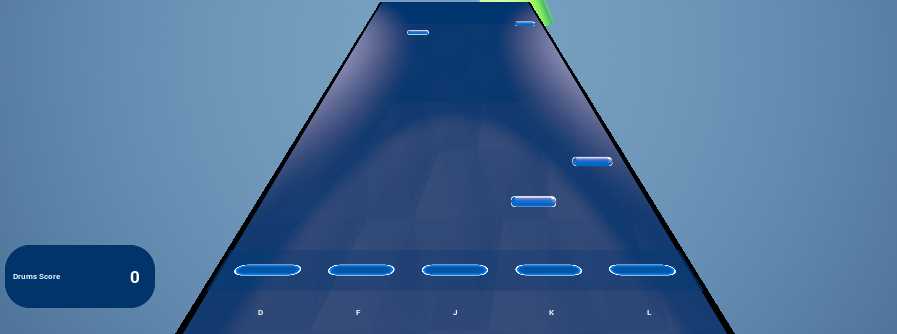
If you’re interested in developing note highway rhythm games similar to Guitar Hero, Fortnite Festival and others, check out the “RhythmTools_Content” folder. Inside, you’ll find specific maps under the “Maps” folder that are designed to showcase both 2D and 3D rhythm games. These examples are a great starting point for understanding how to use the MidiEngine plugin to create engaging rhythm game mechanics in your own projects using Unreal Engine
Creating Audio Visualizers / Music Synced Videos
MidiEngine 3 features comprehensive integration with Unreal Engine’s Sequencer. To explore this functionality, head to the “Sequencer_Content” folder where you’ll find example content. Start by loading the example Level Sequence provided there. Once loaded, enter simulate mode and begin playing the sequence. You’ll observe how the Ball reacts to the combined midi/audio playback that’s been added to the Level Sequence. This example demonstrates how MidiEngine can be utilized to synchronize visual elements with audio in a sequenced environment.
Easy to use but robust virtual Instrument API
MidiEngine 3 comes with some default Virtual Instruments/Samples to help playback MIDI. But if you feel that an instrument is missing, you can easily create your own. Follow the below tutorial to see how you can create custom Virtual Instrument or samples in unreal engine 5.
Or if you want to trigger virtual instruments in unreal engine using MIDI controller or Game events , follow the below tutorial.
How to download the free Music Session Editor
Please Join The Discord And Verify Your Purchase for MidiEngine 3.